Monday, May 24, 2021

Great Time to Join Stampin' Up! - Only 1 more week of the Join+ Starter Kit promotion

JOIN+ STARTER KIT SPECIAL -WANT $56 IN FREE PRODUCT?

Just one more week to take advantage of the awesome Starter Kit special that will end on May 31, 2021.

DETAILS…

This promotion is good through 11:50pm (MT) May 31 when ordering the Starter Kit online. New demonstrators who submit their Independent Demonstrator Agreement (IDA) after May 31 will not be eligible for this offer.

When purchasing the Starter Kit, new team members will be able to redeem $155 USD of Starter Kit eligible products for $99 USD + tax. Shipping is free.

The Starter Kit also includes a FREE past Paper Pumpkin kit ($22 value) and FREE business resources ($50 value) like catalogs, brochures, order forms, and postcards.

Benefits of Joining Stampin' Up! as a demonstrator:
  • HAPPY SHOPPING! Enjoy initial 20% discount and upon reaching certain sales levels, up to 25% off your favorite Stampin' Up! inks, paper, stamps, tools and more when you place your personal orders.
  • ORDER NEW PRODUCTS FIRST! Demonstrators get to order select new products before the catalog goes live to customers.
  • DO IT JUST FOR YOU. There is no obligation to host workshops or parties, sell products to others or purchase anything beyond the kit. See HOW TO CONTINUE BENEFITS & DISCOUNTS for more details on remaining a demonstrator.
  • JOIN THROUGH ME! You will become a member of the larger DO Stamper Stars team We are a supportive community from around the U.S. that offer a positive, pressure free, rewarding and private community of passionate paper crafters. Dawn Olchefske has consistently been in the top 100 Demonstrators in the U.S. and is part of the Million $ Sales Achiever!
  • ACCESS TO RESOURCES! In addition to the team website, you will belong to the DO Stamper Stars private, exclusive Facebook Group, regular Zoom team meetings, newsletters, optional stamping challenges with prizes for participating, recognition, rewards, friendship and fun!
  • EARN EXTRA INCOME AND/OR FREE PRODUCTS! Stampin’ Up! offers a fun and creative opportunity to share your passion for stamping and earn extra income and product. The choice is yours!
  • HOW TO CONTINUE BENEFITS & DISCOUNTS. From the time you join through the end of the first full Stampin’ Up! quarter you can take advantage of demonstrator discounts and benefits. Stampin’ Up! quarters are Jan. – March, April – June, July – Sept., Oct. – Dec. You will have the balance of the quarter in which you join PLUS the first full quarter to reach your first $300 in sales (includes personal purchases) and renew for another quarter, i.e. Join in May, you have until September to reach your first $300 (before discounts).
  • JOIN RISK-FREE! If you reach $300 in sales by the end of the first full Stampin’ Up! quarter, fabulous! You automatically renew your demonstrator discounts and benefits for another quarter. To continue, you will need to reach $300+ in sales (includes personal purchases) to renew from quarter to quarter. If you don’t reach $300 in sales, you can “drop” with no penalty
Please Contact me to review this opportunity and get you started on ordering the Starter Kit online.


Jill Hamlett
Stampin’ Up!® Independent Demonstrator
763-442-8284
Hamlett05@gmail.com

Shop my store 24/7. Orders under $150 use May Host Code * 
 *Host code benefits do not apply to the Join Promotion

Thursday, May 20, 2021

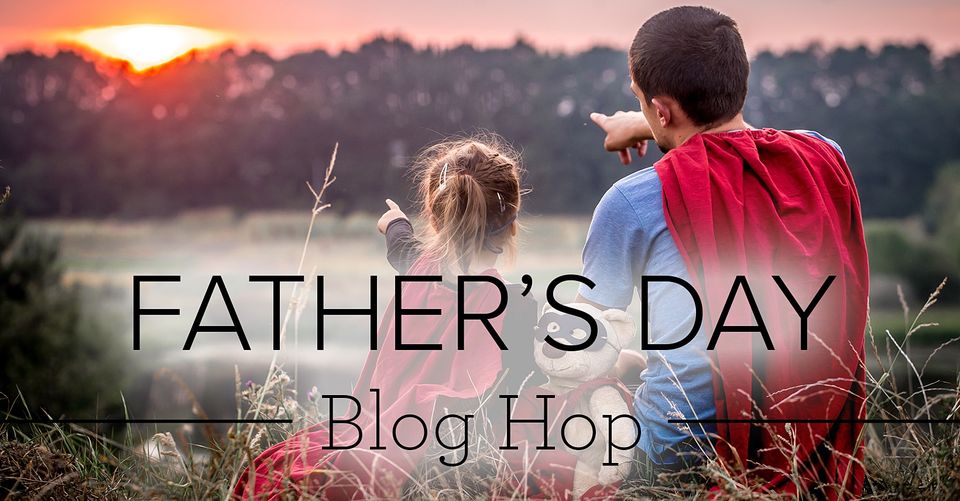
Father's Day 2021 Blog Hop


Father's day in the US is just around the corner and here before you know it. Dad deserves at least  home made card thanking him for all he does. I chose the new Evening Evergreen In-Color for this card base. setting it off is a 3" x 3 3/4" layer of Soft Succulent, another In-Color. Then a  4 1/4" x 3" layer of In- Color Designer Series paper,  

I added a die cut from the Forever  Flourishing dies with Sahara Sand card stock, adhered with glue dots. The 4 " x 3/4" tag is punched with the Lovely Labels punch and stamped with the Father's day sentiment form the Best Year set adhered over the die cut with dimensional.  


I added embellishments on the sentiment tag to finish off the look. A layer of white is added inside so you can write a nice note to you father. 

I hope this inspires you to create your own father's day card. I encourage you to "Hop" along and see the rest of the projects celebrating Father's Day!

 
See my shop below 

Jill Hamlett
Stampin’ Up!® Independent Demonstrator
763-442-8284
Hamlett05@gmail.com

Shop my store 24/7. Orders under $150 use May Host Code
 

Product List

Wednesday, May 19, 2021

Scrapbooking Global Blog Hop May 2021 Hop: DIY Creative Background


Hello and Welcome to the Monthly Scrapbooking Global Blog Hop. This month's DIY Creative Background was selected by Delys Cram, Member of the Design Team. I do not typically do a lot of my own backgrounds, allowing the paper, photos and embellishments to work the magic. This is why I love the challenges this group puts together, it encourages me to create outside my comfort zone.  


I recently received my order with the Artistically Inked Bundle ad Expressions in Ink Designer Series paper, an absolutely gorgeous set. I knew I wanted to work with this bundle. My granddaughter turned one in March and with a great set of cute photos, I also knew I would do this page for her. Lot's of pink involved, so I turned to the new Polished Pink In-Color as my main color on the page. 


The faux water color stamp in the Artistically Inked stamp set really creates the look of water color. I stamped several images in each corner using the softer Blushing Bride ink. I added some dots to the background in Polished Pink. I die cut the detailed large floral image in basic white and used it as a stencil. With my blending brushes, I blended Polished Pink on the large flower, Blushing Bride on the small flower, Granny Apple Green on the leaves and Daffodil Delight on some of the smallest images. I used this in the lowere middle area as this was a main gap between some of the photos in the layout.


I now took that stencil that was colored from the blending brushes and adhered it to the top left corner. Using the Rainbow Glimmer paper, I die cut another floral and laid it over the lowered stenciled area to give it some depth. 

To highlight the photos with some layers, I used cards from the What a Year Memories and More card pack. The colors worked so well and most I just cropped what I needed. I also used the Alphabet Dies to cut my granddaughters name in Rainbow Glimmer paper. Lastly, I added the Happy Birthday sentiment to the heading in the right corner. 


The Polished Pink went so well with the colors in the photos. I just love how this turned out. Due to Covid restrictions where my daughter lives, I was not able to be with her family for this birthday, but glad I could feel a part of the day by memorializing the photos. 

I hope this layout inspired you to think outside of the box when creating a background for your page. When you have great photos to scrap, it makes it easy. 

Hop along to see the other content creators and their projects.  Sara Levin is up next, click below. 


See my shop below 

Jill Hamlett
Stampin’ Up!® Independent Demonstrator
763-442-8284
Hamlett05@gmail.com

Shop my store 24/7. Orders under $150 use May Host Code
 

Product List

Thursday, May 13, 2021

Stampin' Dreams Blog Hop - Graduation Theme


Welcome to today's Blog hop. May does get us thinking about the Grad's in our life and how to celebrate their accomplishments. It just so happened my card class, scheduled this Saturday, will be making graduation cards. 

I don't have much for stamp sets with graduation themes in them, particularly of current products, so I turned to Pinterest for some ideas and landed on using my Playful Alphabet die cuts. TIP: apply your cardstock to adhesive sheets, then the letters for die cutting. Adhesive Sheets make it much easier to adhere the letters to the card. Additionally I used a ruler to make sure they were lined up straight. The 'dots' on the paper helped a lot. 


Not knowing specifics about school colors, I decided to keep it black and white. I also love to use Slimline cards when I know it is likely money will be the gift. Card base measures 7" x 8 1/2", scored at 3 1/2". The sentiment is from the Best Year Stamp set, and I used the  circle layering dies from Tasteful Label Dies, one of my favorite, more versatile die sets. 

The graduation cap is made using the Tailored Tag and Elegant Tag Punch. Carol B Crafts has a great video on how to make the cap using the Tailored Tag punch Click here to view  I decided instead of free cutting the lower part of the cap, I'd use the bottom element of the tailored tag punch to make a more clean curved line. I did end up punching it twice. Tip is to attach a narrow strip of cardstock to the punch tag to make it easy to insert into the punch You can use either way. Here are the photo samples 


I added embellishments of ribbon behind the sentiment and gilded gems to finish off the look of the graduation cap. I'm really pleased with how the cards turned out and hope it inspires you to create your own graduation card. 

I encourage you to "Hop" along and see the rest of the projects celebrating graduations! 


See my shop below 

Jill Hamlett
Stampin’ Up!® Independent Demonstrator
763-442-8284
Hamlett05@gmail.com

Shop my store 24/7. Orders under $150 use May Host Code

Product List

Share It Sunday - December 2023 - Birthday Card Organizer Kit

The Crafty Collaborations Team is comprised of Stampin' Up! Demonstrators from around the world. Each month we participate in several co...